I was finally able to get this job done. Here's what I learned:
1) When disassembling the front end, take lots of photos so that you remember how to route the wires, particularly the mirrors.
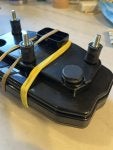
2) Fairing removal takes more time than fixing the dash
Step 1: Remove both side fairings, mirrors, front nose, etc
Step 2: Once you've gotten to the dash itself, the dash is held on by 3 8mm nuts, these are easy to remove
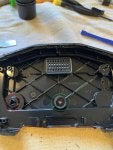
Step 3: Now that you have the dash in hand, familiarize yourself with the layout. The black bezel is what you are going to cut (I used a dremel with a plastic cutting wheel going at a very slow speed). Using a slow speed on the dremel, you can slowly work your way around the seam of the dash. As soon as you see white plastic, stop cutting and move to another section. In reality, you dont need to fully cut the plastic all the way through the whole way around. Its pretty brittle and I was able to snap it free with a flat head screw driver because I was paranoid every time I saw white. But, it looks like the white plastic has a good buffer before you get to anything vital, so even if you nick it with your cutting wheel it should be fine. Picture below for reference about how far in youll need to cut.
Note: I did try a hair drier and some tools to pry the top off. I've seen reports that others were able to get theirs out. But after trying this for 2 hours, I gave up and just cut it with the dremel.
Step 4: Once you've removed the top half, you'll be able to see the actual display. The surround is just lightly glued on and i was able to use a spudger from a cell phone repair kit to gently lift it off
![Image]()
Step 5: This is where it gets a little tricky. The electronics are held in by 5 T6 screws (locations in red), and some glue (in green). The issue is, the glue around the edges is left over from the sealing process. You can slowly work this apart. However, there is also a big dab of glue underneath that you'll need to get at. Otherwise if you just try pulling, the whole circuit board starts to bend. So what I did was cut a small window in the lower half of the black plastic so I could get at the glue from underneath. WARNING: There is a ribbon cable near the bottom center, so if you go too deep you might ruin the dash. In the photo below I pulled the white part away from the circuit board by releasing the two clips (right above the screw holes on the bottom side of the dash. You dont need to do this. I only did this because I was trying to figure out why I couldnt pull the electronics out, I figured there was a screw underneath but I was wrong, only glue.
To be continued in next post....
![Image]()


